(available in ![]()
![]()
![]() )
)
The purpose of the Group Capture feature is to rapidly associate images with Spectra data and process those images to save you countless hours of manual processing. The feature is designed to be used when shooting a large group of people, such as a school, dance, or other organization. However, the feature can also be used when shooting just one client at a time.
The Group Capture screen can only be used when your camera is tethered to your Spectra computer. When using Group Capture, you have three choices to associate your images with Spectra data:
Use the Session Search feature to find a session that was previously booked in Spectra. Perhaps the sessions were created using the Bulk Scheduling feature.
Use the Client Search feature to find a client that was previously created in Spectra. Perhaps the clients were created using the Client Import Wizard. Spectra will then automatically create the session record for you.
Enter a new client’s basic information, like name and address, and Spectra will automatically create the client and session records for you on-the-fly.
The Group Capture screen is designed to automate many tasks for you during the shooting process, including:
Immediately preview images as they are shot.
Delete bad images you don’t want.
Copy the hi-res or raw files to the appropriate Spectra image folder.
Rename the image files.
Create JPEG previews of the hi-res images for sales presentations.
Add metadata keywords to the images.
Many of these tasks are completed behind the scenes, without you ever seeing it! The Group Capture utility is a very powerful tool that allows you to automate much of your digital workflow, saving you countless hours of manual labor.
To begin Group Capture you have three options.
Select Group Capture from the Tools menu.
From the Workflow
hub, click Group Capture  .
.
Or, open a specific session and click Group Capture on the Action tab of the ribbon. The Group Capture screen will launch with this specific session already selected.
When you first start Group Capture, you will be prompted to set up your Import Options. Click Menu in the upper-right corner of the Group Capture screen and then select Options to return to the Import Options screen at any time.
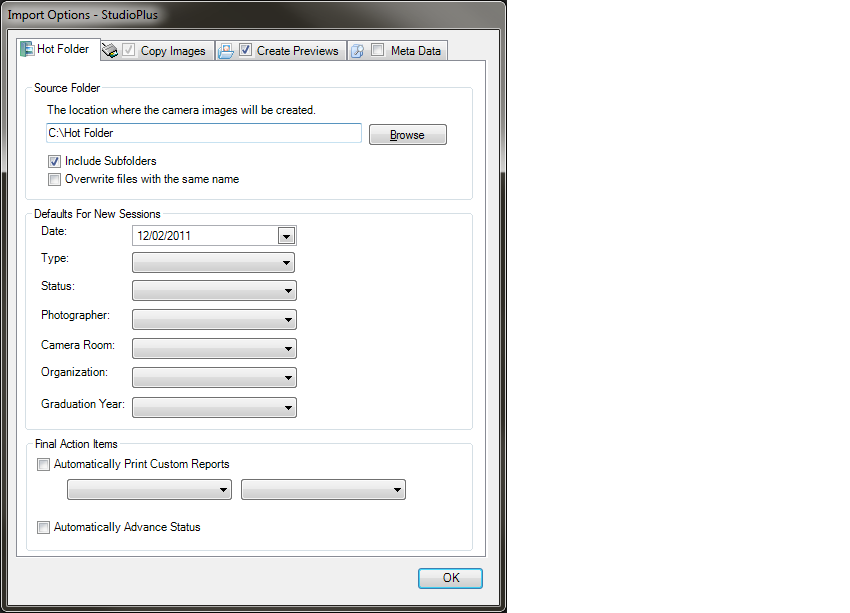
Import Options - Hot Folder Tab
Source Folder - On the Hot Folder tab, select the Source Folder where the camera will save the images. Group Capture does not interface directly with your camera. Rather, you will need to tether your camera to your computer and open your camera software. In your camera software you can select the folder where you want your images saved. Select this same folder in the Import Options Source Folder field. You can choose to Include Subfolders if your camera software creates subfolders. You can also choose to Overwrite files with the same name. Otherwise, you will get a warning message if Group Capture encounters a duplicate file.
Defaults for New Sessions - Set any defaults for new sessions. If you have not already created session records for the clients you will be capturing, you will need to set these defaults. If you use the Client Search or New Client options, it will use these defaults to create the new session: Date, Type, Status, Photographer, Organization, and Graduation Year.
 |
ATTENTION!
Group Capture requires that you assign session numbers to any new sessions at the time of booking. If you use Group Capture to create new session records, go to Studio Preferences > Sessions and select the option to assign the session number at the time of booking. |
Final Action Items - Choose actions to be taken once the session has been captured. You can choose Automatically Advance Session Status.
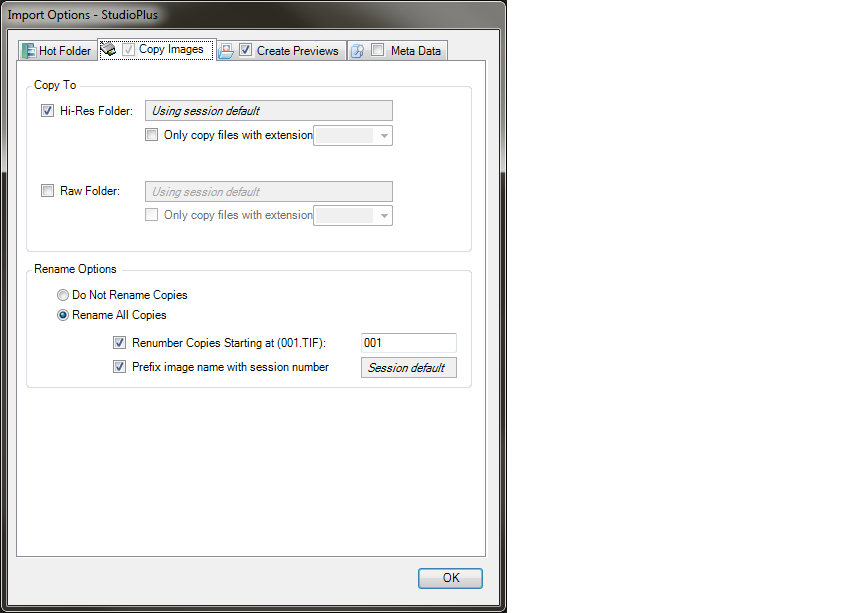
Import Options - Copy Images Tab
Copy To - Set the copy options on the Copy Images tab. If you are shooting hi-res JPEG, choose the hi-res folder. If you're shooting raw, choose the raw folder. If you're shooting raw + JPEG, choose both folders and set the file extensions for each in the Only Copy Files with extension box.
|
ATTENTION!
Spectra is not a raw conversion software. If you're capturing only raw images, Spectra will create a JPEG preview of the image, but it may not be properly white balanced or color corrected. |
Rename Options - If you want the images to be renamed when they are copied, choose the Rename All Copies option. Then set the Renumber Copies Starting at box to the starting number. If you want an image prefix, select the Prefix image name with session number box.
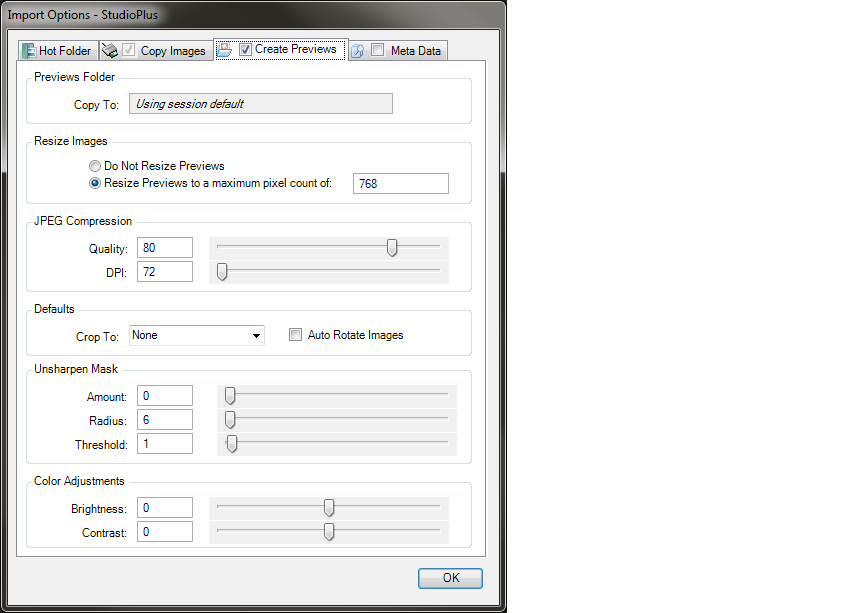
Import Options - Create Previews Tab
Previews Folder - The Create Preview tab is where you set the options for the JPEG previews (used for the sales presentation). If you choose not to create previews, Group Capture will only copy the images. You will then need to manually create preview files.
Resize Images - We strongly recommend that you choose to resize your preview images. For sales presentations, set the pixel count to 1000-1200, depending on the screen resolution and size of your sales presentation monitor.
JPEG Compression - Set the Quality to 80-100 and DPI to 72. The only time you should increase the DPI higher than 72 is when you want to print higher quality proof or contact sheets from Spectra. In that case do not increase the DPI above 150.
Defaults - Set the default Crop if you want Spectra to pre-crop the preview files. In this case it will center the crop on the image, but the crop can be changed in Digital Workflow or Sales Presentation. By selecting the Auto Rotate Images option, Spectra will use the camera settings to determine if images should be rotated. Your camera should then be set to auto-rotate when capturing.
Unsharpen Mask and Color Adjustments - These settings are only applied to the preview images.
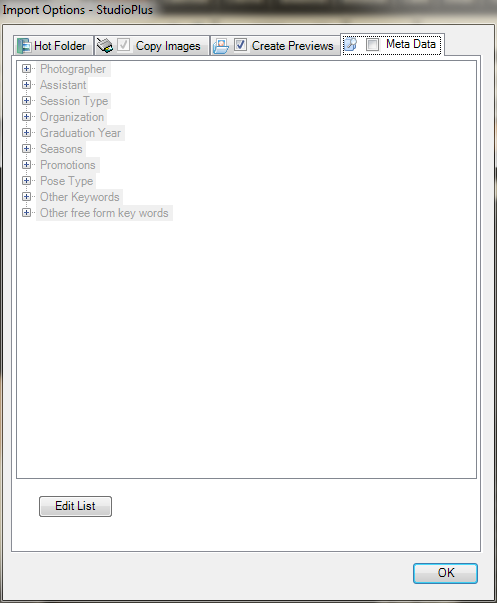
Import Options - Meta Data Tab
Metadata
- Select options on this tab if you want metadata keywords added to
the images as they are captured. The metadata is only added to the
preview file's keyword property. There are a number of pre-set values,
such as Photographer, Assistant, Session
Type, Organization,
and Graduation Year.
You can also create your own
properties. Click Edit List
to edit your metadata options. Then click Add
New Category to create a new category. Click on the new item
and type in the name. Then click Add
New Item to create the keywords for this category. The categories
can either allow multiple items, or be set to allow just one by setting
the Allow Multi Select option
appropriately.
Click OK to complete the Import Options.
Next, you'll need to select a session that you want to associate your first batch of images with. If you have already selected a session by launching Group Capture from an open session, you will not need to search. Otherwise, go to Session Search to search by session, Client Search to search by existing client, or New Client to create a new client (and session). You can also scan a Spectra client or session barcode to automatically select the appropriate session.
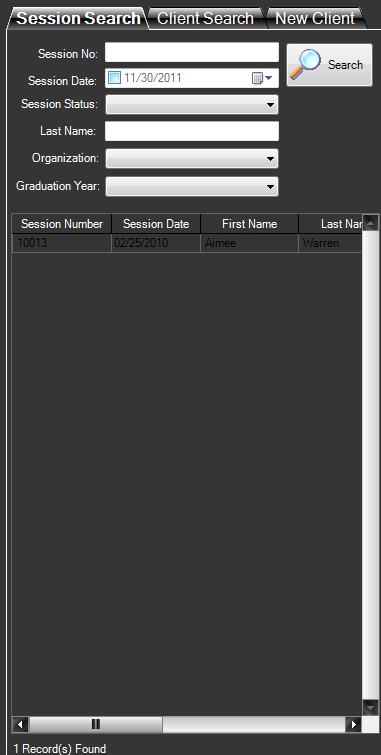
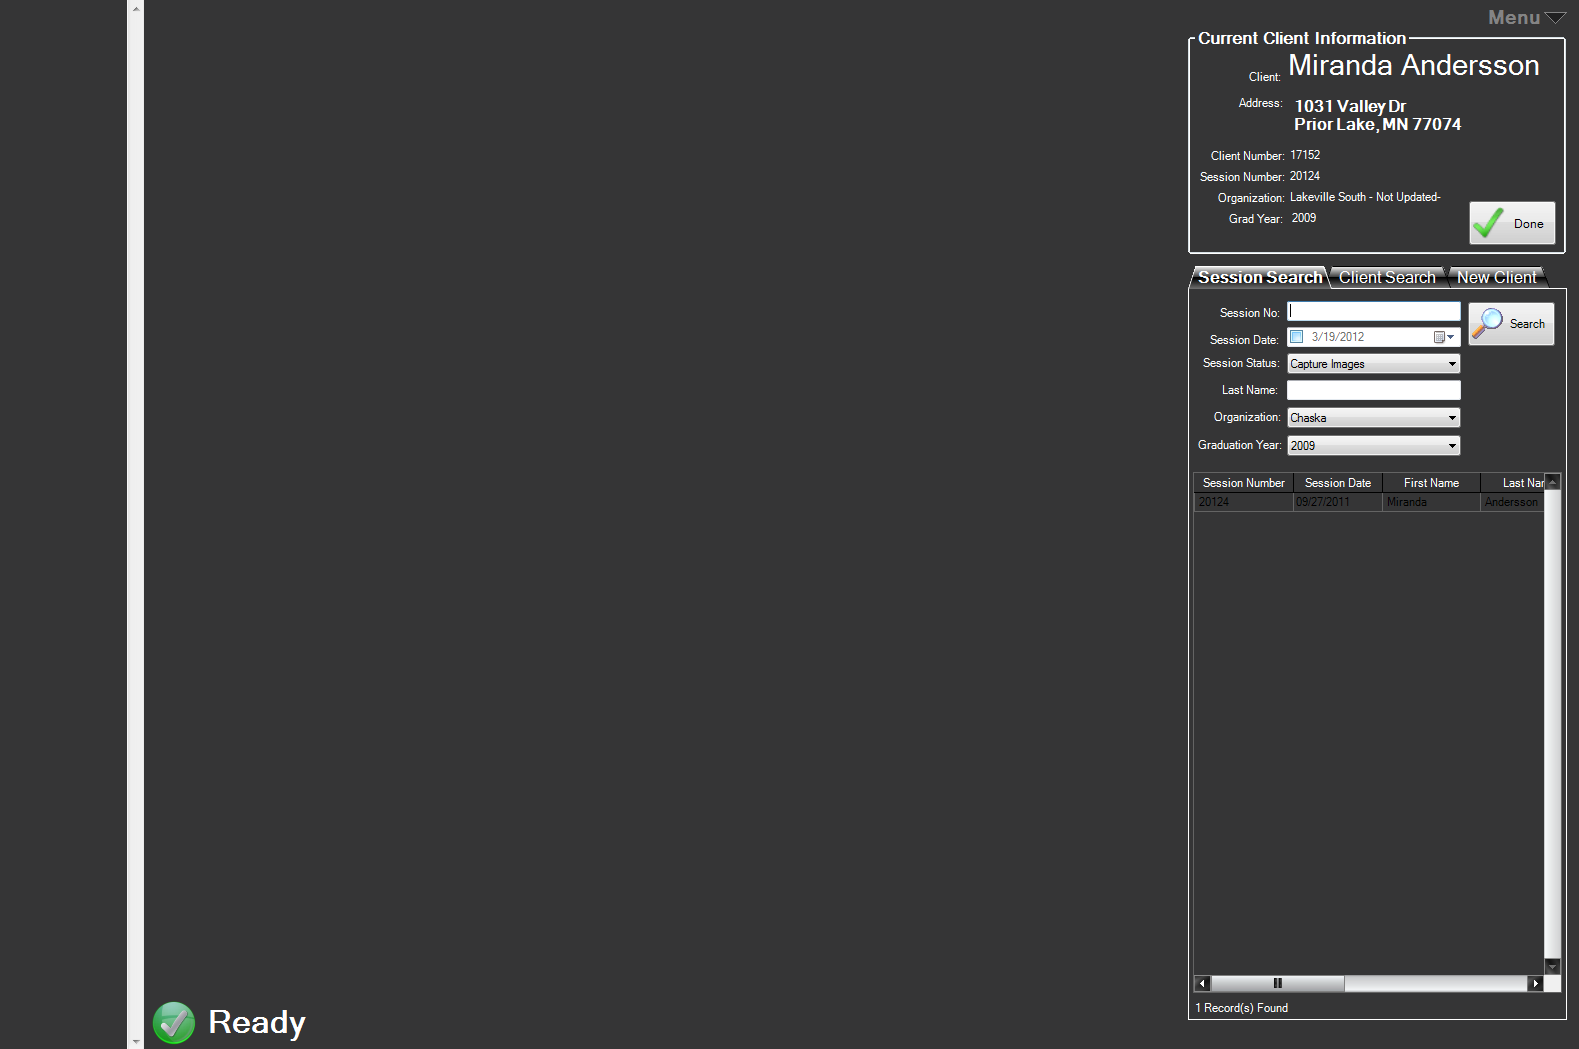
Group Capture Search
Session Search - Search by session number, session date, session status, client's last name (enter their entire last name), organization, or graduation year. Click Search to find the records. Then double-click the desired session to select it.
Client Search - Search by client number, first name, last name, organization, or graduation year. Click Search to find the records. Then double-click the desired client to select it. Once the client has been selected, Spectra will automatically create a session based on your Import Option defaults.
New Client - If the client has not been entered into Spectra, you can enter them now – first name, last name, address, home phone, and email. Click Save. A client and a session will be created based on your Import Option defaults.
Once you've selected the session, the client's information will appear in the Current Client Information area. This record is now ready to be captured.
You are now ready to begin capturing images.
Group Capture
As you begin shooting, images will appear on the left side of the Group Capture page. You will see thumbnails for each image being captured. You will see a green status bar on the bottom of each image indicating that the image is being processed (copied, renamed, preview being created, etc.).
Each image will appear in the center of the Group Capture screen as it is being captured. Click on a different thumbnail at any time to move that one to the center.
Select a thumbnail and click Delete in the upper-left corner if you do not want to keep this image. Note: Deleting the image will delete all copies of this image permanently.
When finished capturing images for a client/session, either click Done or simply select another record to complete the processing for that client.
Under the Menu in the upper-right corner of the Group Capture page, you have a number of other options.
View Client - Open the client for the currently selected session.
View Session - Open the currently selected session.
Print - Print the client and session information for the currently selected session.
Close Group Capture - Exit Group Capture.
![]()