(available in ![]()
![]()
![]()
![]()
![]() )
)
The Calendar is the best way to view schedules for your users and resources. A resource can be any facility, studio, room, camera, or equipment that you want to keep a schedule for. Schedules for multiple users and resources can be viewed simultaneously in an easy-to-read, graphical layout, making it easy to compare schedules or check for availability. When setting up users (Maintenance > Studio > Users) and resources (Maintenance > Appointment > Resources), make sure to check the "Show on Calendar" option for each user/resource you want to maintain a calendar for. They will then be included in the Users and Resources panel in the lower-right corner of the calendar and their schedule will be available for viewing and booking.
Double-clicking on any available time slot launches the easy-to-use Scheduling Wizard, which will automatically create a session or appointment for a new or existing client, along with the invoice and receipt of payment, if necessary. Double-clicking on any existing session or appointment will open the appropriate session or appointment with further details.

The Calendar
Get familiar with the Calendar as shown above. As you see, the calendar defaults to the current user and today’s date. The mini calendars on the right are an easy way to select the day(s) you wish to view. You can also choose the calendar(s) you are viewing by making one or more selections in the list of Users and Resources in the lower-right corner.
There are a number of options available on the calendar.
Single-Click - To quickly enter an unlinked appointment, just single-click a time slot on the Calendar and then type in the information.
Double-Click - Double-click a time slot on the Calendar to start the Scheduling Wizard to schedule a session or linked appointment.
Click and Drag - Click and drag an appointment or session to reschedule it. Drag it across days or calendars to change the date or the user.
Right-Click Appointment Options - When you right-click an appointment, you can choose View Client to open the client (if the appointment is linked to a client), View Appointment to open the appointment, or Copy Appointment to copy the appointment and paste to another time slot (just right-click the new time slot and choose Paste Appointment).
Right-Click Session Options - When you right-click a session, you can choose View Client to open the client, View Session to open the session, or Start Sales Presentation to begin a sales presentation (session must already contain images).
You can customize the information that is displayed on the calendar (as well as the color!) for each type of session or appointment that is scheduled. Set up your session types in Maintenance > Session > Session Types and appointment types in Maintenance > Appointment > Appointment Types. You can also choose the default session and appointment types to be used when scheduling. See the "Studio Preferences - Sessions" and "Studio Preferences - Appointments" sections for more information on customizing your sessions and appointments on the calendar.
 |
HERE'S A FLASH FOR YOU!
Here are some handy tips to help you modify your schedule: - To enter special date headers for special events or holidays such as “Christmas” or “Bunny Promotion,” go Special Calendar Events in Maintenance > Studio. - Drag and drop appointment or session blocks to move them to a new time/date/user. - To quickly enter an unlinked appointment, simply click once on the desired time slot and start typing. |
Spectra makes it easy to print your calendar for specific days, times, users, or resources.
Click Print
 on
the toolbar.
on
the toolbar.
Select the style(s) from the drop-down list(s).
Choose the start and end dates you want to print.
If you want to print the calendar information for all users on one calendar, click Merge Owner Info. Otherwise, the printed schedule will contain a column for each displayed user. The printout will include any users or resources that you currently have selected to display on the calendar.
Experiment with the different styles to get the desired output. You can always preview it first to see if it will turn out as you like.
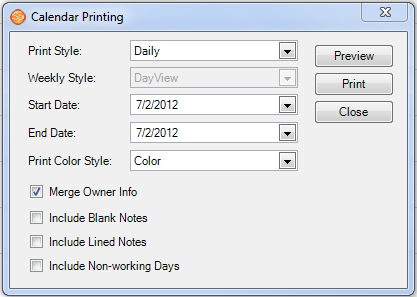
Calendar Printing Options
![]()