(available
in ![]()
![]()
![]() )
)
Appointment Triggers allow you to automate communication with your clients by triggering emails or SMS texts to be sent to the customer, letters to be printed, phone call reminders to be generated, or tasks to be assigned based on the appointment date or the booked date.
Go to Maintenance
> Appointment > Appointment Triggers.
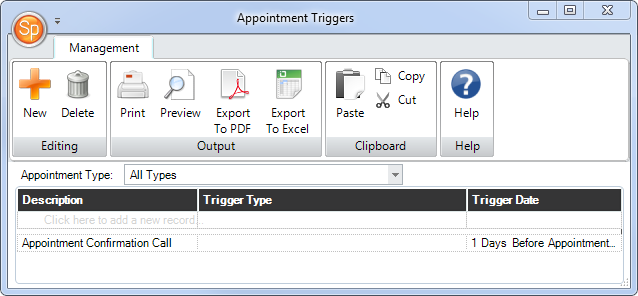
Select a specific appointment type (or "All
Types") from the drop-down list and then click New
on the ribbon to create a new trigger for that type.
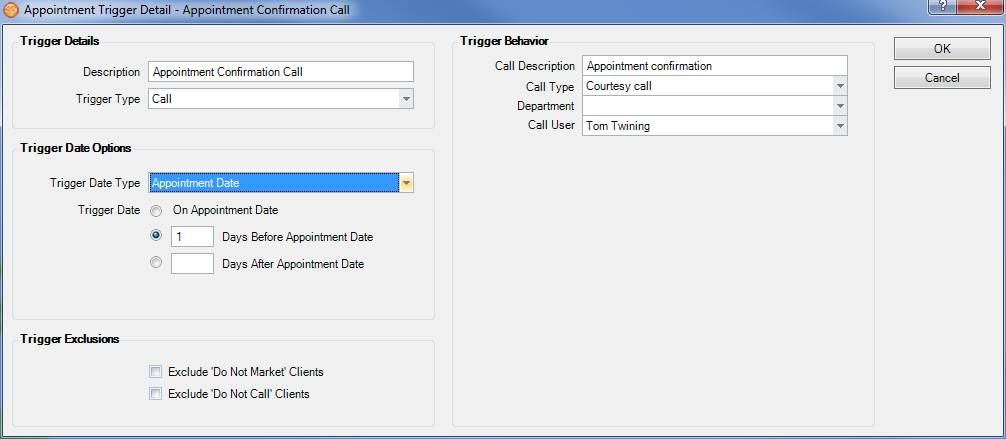
Type in a Description for the trigger.
Select the Trigger Type from the drop-down list. The following choices are available:
Call - Create a call record for each appointment that meets the criteria at the time the trigger is processed.
Email - Send an email to each client with a appointment that meets the criteria at the time the trigger is processed.
Letter - Generate a printed letter for each client with an appointment that meets the criteria at the time the trigger is processed.
Email/Call - Send an email to each client with an appointment that meets the criteria. If a client doesn't have an email address on file, a call record will be generated instead.
Email/Letter - Send an email to each client with an appointment that meets the criteria. If a client doesn't have an email address on file, a printed letter will be generated instead.
SMS - Send an SMS text message to each client with an appointment that meets the criteria at the time the trigger is processed.
SMS/Call - Send an SMS text message to each client with an appointment that meets the criteria. If the client doesn't have a phone number that is SMS-enabled, a call record will be generated instead.
Task - Generate a task for each client with an appointment that meets the criteria at the time the trigger is processed.
Choose your Trigger Date option:
Appointment Date - With this option, the trigger is based on the scheduled appointment date. Select On Appointment Date or enter the number of days before or after the appointment date.
Appointment Booked Date - With this option, the trigger is based on the date the appointment was booked. Select On Appointment Booked Date or enter the number of days after the booked date.
Choose to exclude "Do Not Market" and/or "Do Not Call" clients if desired.
Enter and/or select the appropriate Trigger Behavior. These options will vary based on the trigger type you've selected.
Click OK to save the trigger.
Spectra will set up the trigger for processing by filtering through your database and excluding records that may have fit the criteria in the past. This prepares the trigger for use going forward. Triggers can be processed by going to Utilities > Run Status Triggers.
For more information on using triggers throughout Spectra, please see the "Triggers" topic in the "Spectra Tools" chapter.
![]()