In this topic... Show
(available in ![]()
![]()
![]()
![]()
![]() )
)
Spectra allows you to import client records from other programs. The types of files that Spectra recognizes are comma delimited text files (.txt or .csv) and Excel® spreadsheet files (.xls). To import client records, follow the steps below.
 |
HERE'S A FLASH FOR YOU!
You may find that you've received a list of clients or prospects that has bad information, duplicate entries, or mislabeled columns. It may be easier to try to correct this in the list before you import it into Spectra. Remember Spectra is a database, what you put in is what you get out! |
From the Spectra Utilities menu, choose Import Clients.
The Client Import Wizard will launch.
If you will be importing from a new data source, choose the type of file you'll be importing from the following options:
Comma-Delimited Text File (txt, .csv)
Excel spreadsheet
(.xls)
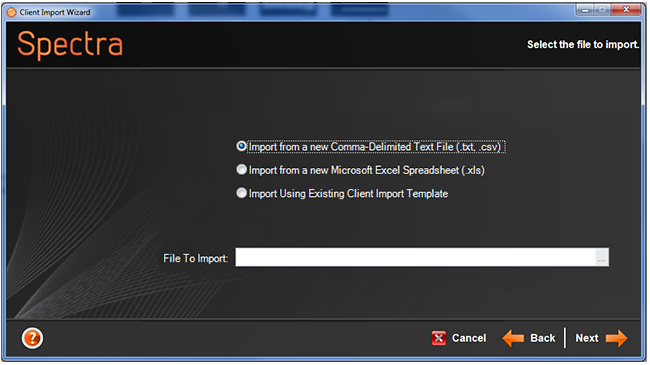
If you wish to use an existing import template, select Import Using Existing Client Import Template and then select the template from the drop-down list.
Browse to locate the file and click Open.
Find each appropriate Spectra field in the right pane and drag and drop each one onto the corresponding column in the left pane.
![]()
Client Import Wizard – Assign Fields
When you're done assigning each field, click Next.
Spectra can check for duplicates during the client import. Note: The settings Spectra uses to evaluate whether a record is a duplicate are determined by the settings on the Clients page in Studio Preferences. Each time you import clients you can choose from the following options:
Do not check for duplicates
Do not import possible duplicates
Import possible duplicates but add to a client group
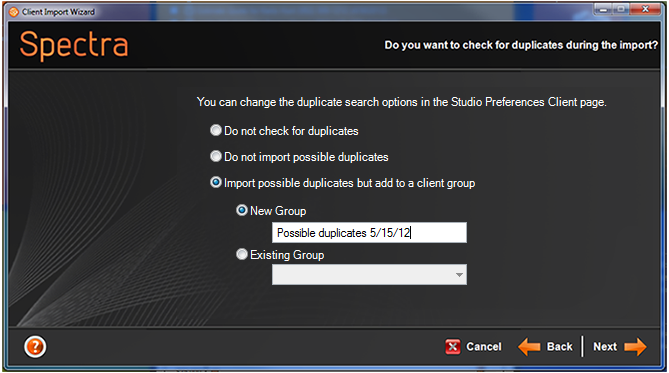
Client Import Wizard
– Duplicate Check
Click Next.
Click Automatically Assign Client Number if you're not importing a pre-assigned client number for each client.
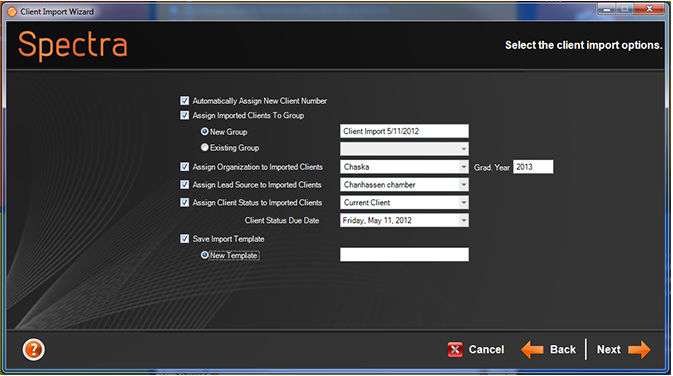
Client Import Wizard – Assign Clients
Click Assign Imported Clients to Group if you want these clients to be placed in a new or existing client group. Because this option is strongly recommended, you'll see this choice already selected, along with a suggested group name, such as "Client Import dd/mm/yy."
Click Assign Organization to Imported Clients and select the organization (such as the high school) and enter the Grad Year. Use this option if all the clients are from the same high school.
Click Assign Lead Source to Imported Clients if all the clients have the same lead source.
Click Assign Client Status to Imported Clients and set the Status Due Date if you want all these clients to be at a particular status.
|
HERE'S A FLASH FOR YOU! It is recommended that you place your new clients in a new group called something like ‘Import Sept 1.’ That way, if you discover something went wrong during the import (i.e., you forgot to import a field), you can delete the group of clients you just imported using the Delete a Group of Clients tool and then re-import them. |
|
HERE'S A FLASH FOR YOU! If you have a list of clients or prospects in a text file or Excel spreadsheet that you want to be imported into different groups, you can create separate files for each group and import them separately. This makes assigning the group, high school, or lead source much easier. |
If this is an import that will be used again in the future, you can save it as a template. This will save you from having to assign the fields again. To save it as a template, click Save Import Template. Type the name you want to assign to this template and click OK.
Click Finish.
(available in ![]()
![]()
![]()
![]()
![]() )
)
Spectra has the ability to export a group of clients to an ASCII text file (comma-delimited).
From the Spectra Utilities menu, choose Export Clients to launch the Client Export Wizard.
Choose the filter or group of clients that you want to export. Mark whether you want to exclude those clients flagged with Do Not Market. Click Next.
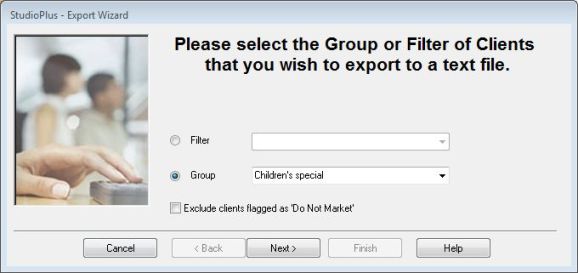
Client Export Wizard
Enter the path and file name of the text file that should be created during the export. Click Next.
Click Finish to begin the export. When the export is complete, you can open the text file containing your client data.
![]()