(available in ![]()
![]() )
)
The Capture One integration allows you to control what images you are developing for previews, retouching, and rendering from Spectra, using Capture One Pro in the background to process the images.
StudioPlus [Spectra] version 2007 or newer
Capture One version 3.7 (Note: Capture One 3.7 is the only version that will integrate with StudioPlus Spectra.)
 |
PATHWAYS TO SUCCESS
The two biggest challenges with most raw workflows are time and space. Spectra’s Capture One integration is a great solution for both! Because Spectra uses the Capture One raw conversion engine, the conversion process is fast. And, because Spectra controls when the images get converted, only images that you need are actually converted. Rather than converting all your raw files to hi-res JPEGS or TIFFS, Spectra creates low-res previews for selling. Then if you need a hi-res file for retouching, proofing, or sending to your lab, Spectra creates it for you when you need it -- so only retouched and ordered images are converted. This will allow you to only create hi-res JPEG or TIFF images of your raw files when you need to (for retouching or just for ordered images) instead of creating full hi-res files for every image, streamlining your raw workflow. |
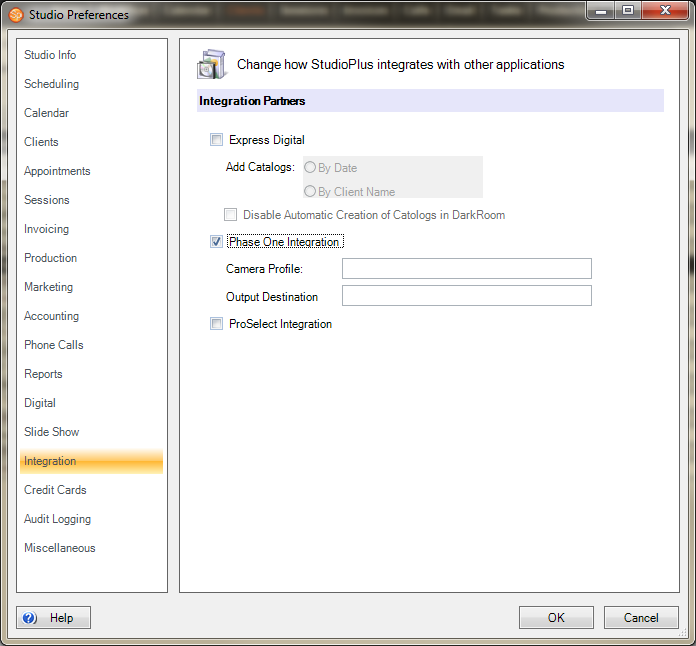
Select the Capture One integration from Maintenance > Preferences > Studio Preferences > Integration tab and click Phase One Integration.
Enter your preferred camera profile and output destination color space. Find these in the Capture One > Workflow > Color Management Settings, and type them into the Spectra integration settings screen exactly as they appear in Capture One.
Go to Maintenance > Preferences > Workstation Preferences > Digital tab and set the Image Editor to your Capture One .exe file.
Go to the Digital Workflow > Capture screen in Spectra, and highlight the appropriate session.
To capture from a camera card, click Import Images. In the Import Images screen, copy the files from the camera card to the raw folder. Do not create previews at this stage.
On the Capture Images screen, click Launch Capture Software and Capture One will open with the session raw folder already selected. Adjust your color balance, levels and curves in Capture One.
In Spectra, click Create Previews to create low-res previews from your raw images.
Note: Do not crop your images in Capture One. Use Spectra to show crops to your customers and render out final cropped images. See the Render Images section of the "Sales Presentation" topic in the "Working With Digital Imaging" chapter for more information.
Select an image that you want to edit. Click Edit Image and choose the “Retouched Image.” Spectra will then use Capture One to convert the raw file to a hi-res TIFF file and will open the TIFFS in Photoshop for editing.
To develop raw files into a hi-res TIFF or JPEG files, select the images from the Digital Workflow Capture Images and click Develop Raw files. This will convert any raw files using Capture One and save the TIFFS or JPEG to the Spectra hi-res folder.
If you're using the Render Images feature of Spectra, you can render images for proofing or for final prints.
Select the images you want to render and select the render profile (see the Render Images section of the "Sales Presentation" topic for more information).
Spectra will render files. If there are any files that have not been converted to hi-res JPEG or TIFF files, Spectra will now develop those files using Capture One.
![]()