(available in ![]()
![]()
![]()
![]()
![]() )
)
In this topic... Show
The Present Images stage of the Digital Workflow is set up for you to prepare and present a slideshow and the session images to your client in a professional way. You can set up and run the presentation and slideshow from the Workflow hub or from the actual session record.
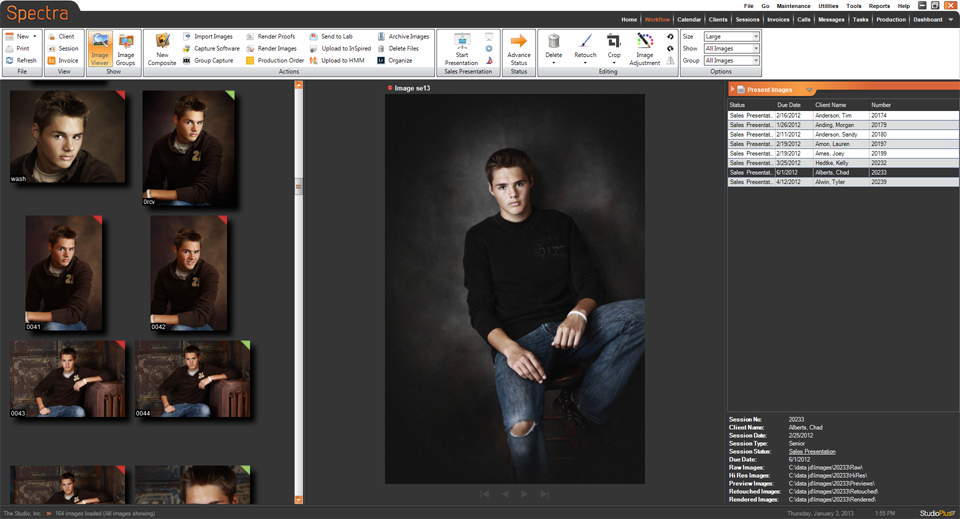
Workflow Hub - Present Images
You'll want to set up your sales presentation before you present it to your clients.
Open the Workflow hub and select the Present Images stage on the digital workflow drop-down list. Select the session from the session list and the session images will appear on the left portion of the screen.
See the "Digital Workflow Reference Guide" for a complete list of functions and features you can use to edit and prepare your images for the sales presentation.
 |
HERE'S A FLASH FOR YOU!
Spectra provides a feature that allows you to organize session images in Spectra based on metadata that has been applied in Lightroom. For example, if you use Lightroom to rate and group images, you can carry those ratings and groups over to Spectra by clicking Organize on the ribbon and then selecting a Lightroom Metadata Preset you've created for this type of session. For more information on setting up your Lightroom presets, refer to the "Lightroom Metadata Presets" and "Lightroom Metadata Preset Details" topics in the "Spectra Maintenance" chapter. |
To select multiple images, click on an image and press the Ctrl key and click on another image. To select a series of images, click on an image and press the Shift key and click on the last image in the series. You can make changes to all the images you've selected.
Click Image
Viewer  in
the Show group of the ribbon
to open the image view. The selected image will appear larger on the
right portion of the screen. You can scroll through the images one-by-one
using the arrows below the main image or jump to another image by
clicking on a thumbnail on the left.
in
the Show group of the ribbon
to open the image view. The selected image will appear larger on the
right portion of the screen. You can scroll through the images one-by-one
using the arrows below the main image or jump to another image by
clicking on a thumbnail on the left.
Click Image
Groups  in the Show
group of the ribbon and the image groups for this session will appear
to the right of the image(s). Right-click in the groups portion of
the screen and click Add New Group
to create additional image groups. You can then drag and drop images
into the folders. The All
Images group will always show
you all the session images. The Ungrouped
image group will always show you images that are not in any group.
in the Show
group of the ribbon and the image groups for this session will appear
to the right of the image(s). Right-click in the groups portion of
the screen and click Add New Group
to create additional image groups. You can then drag and drop images
into the folders. The All
Images group will always show
you all the session images. The Ungrouped
image group will always show you images that are not in any group.
|
HERE'S A FLASH FOR YOU!
There are many ways you can use image groups. Create a group for your slideshow and then rearrange the images as you want them to appear in the slideshow. Create groups for outdoor and indoor images. Create groups for your weddings to organize pre-ceremony, ceremony, and reception images. Within each group you can arrange the images in any order and then use the Sales Presentation to present these groups to your clients. These groups are saved with the session so you can access them at any time. |
Use the Size drop-down list in the Options group of the ribbon to adjust the size of the thumbnail preview images on your screen.
Use the Show drop-down list in the Options group of the ribbon to show only those images with a specific rating.
Use the Group drop-down list in the Options group of the ribbon to show only those images in a specific group.
Click on an image (or a selection of images) and drag to a new location to rearrange the order of the images.
Use the Image Adjustment feature to adjust the sharpness, brightness, and/or contrast of an image. After making your adjustments, a new preview image will be created. Note: At this point, these image adjustments are simply for viewing purposes. You can choose to apply them to the hi-res or retouched images in the rendering process later.
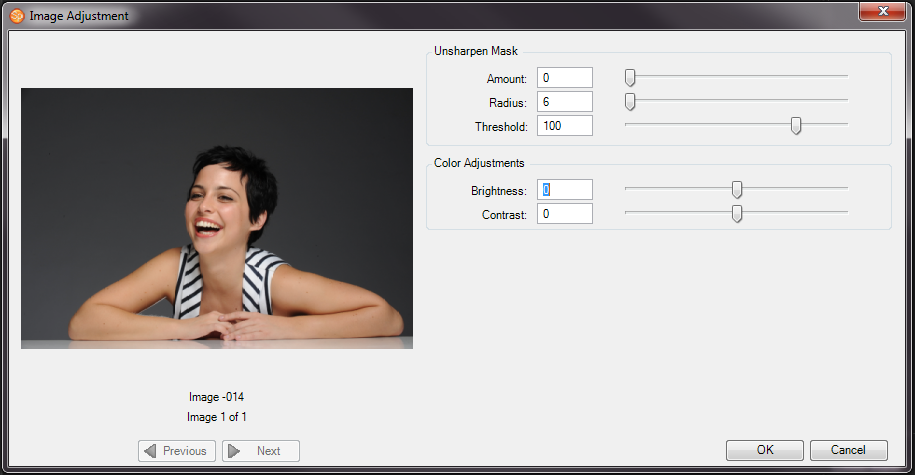
Image Adjustment
You can also modify the default slideshow settings
for an individual session by clicking Change
Slideshow Settings
 . See the “Setting
up Your Digital Workflow in Spectra” topic in this chapter for
information about setting up the studio default slideshow options.
. See the “Setting
up Your Digital Workflow in Spectra” topic in this chapter for
information about setting up the studio default slideshow options.
Use MP3 files, WAV files, or music directly from a music CD for your slideshow. MP3 and WAV files are preferred. You can select between zero and five songs for each slideshow. After the last song is played, the sequence of songs is repeated. Click OK to save and close the Slideshow Settings.
Now that you have prepared the presentation and slideshow for this session, click Session Status to advance the status of this session.
 |
ATTENTION!
You must have Windows Media Player installed to play music with your slideshows. To install Windows Media Player, visit: http://www.microsoft.com/windows/windowsmedia/default.aspx. Please note that due to copyright protection written into later versions of Windows Media Player, some files may not play correctly in Spectra. For best results use MP3 or WAV files. |
Click Start Slideshow to begin the slideshow.
Use the Space Bar to start the slideshow, the I key to show the image number, and Esc to end the slideshow.
Click Stop Music to fade out the music.
|
HERE'S A FLASH FOR YOU!
Integrating third-party slideshows or Animoto™ videos into your Spectra sales presentation Some photographers like to prepare slideshows or videos ahead of time in other software applications. If your slideshow software has the ability to export or save the slideshow as an .EXE executable application file, then you can integrate your slideshows with the Spectra Sales Presentation. Simply export your customer's slideshow as "Slideshow.EXE" and save it to the session's Previews folder. To play an Animoto video instead of a slideshow, name the video file "Slideshow.MP4" and save it in the session's Previews folder. When you click Start Slideshow in Spectra, your alternate slideshow or video will begin. |
From the Workflow hub, select a session and click Start Presentation in the Sales Presentation group of the ribbon. The Sales Presentation window, designed to show the session images to the client, will open in front of the Spectra Workflow hub.
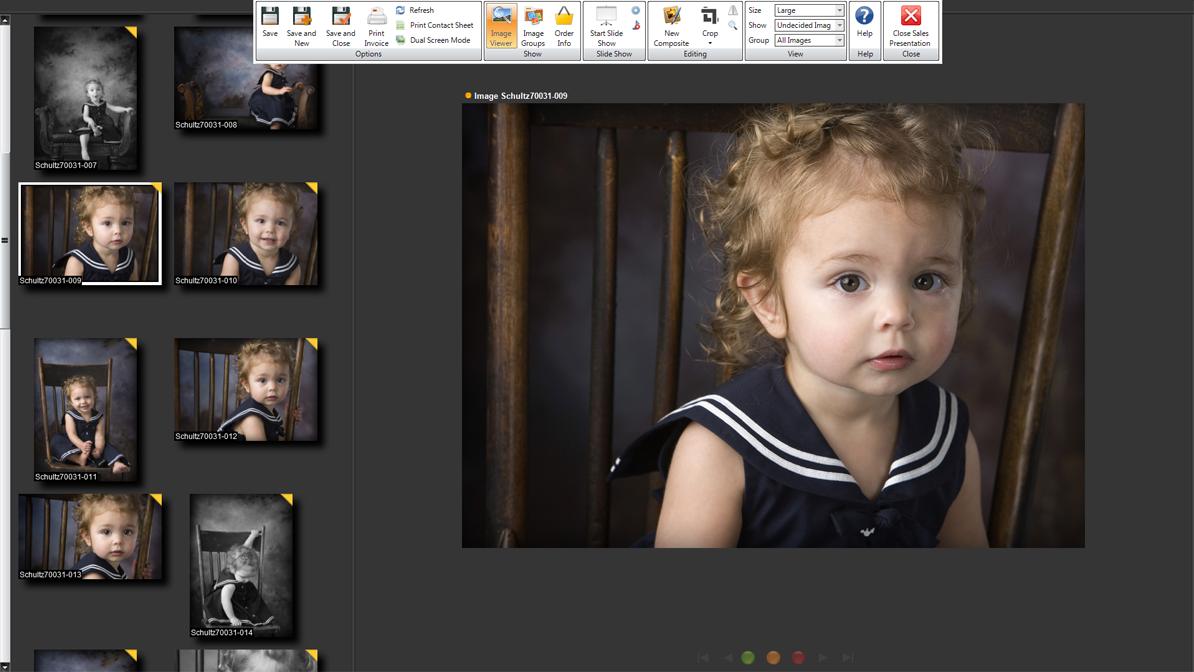
Sales Presentation
Once inside the Sales Presentation, the left portion of the screen will contain your preview images and the center portion of the screen will display the Image Viewer. If you move your cursor to the top of the screen, the toolbar will appear.
|
HERE'S A FLASH FOR YOU!
Presenting a slideshow on a projector You have the option to set up your presentation so that you control what images your client sees on the projector, while at the same time selecting from all the images on your monitor. In order to do this you must have Windows XP, Vista, or Windows 7 and the projector must be set up as a secondary monitor. Consult your Windows Help for instructions on how to set this up. Then, in the Sales Presentation screen the Image Viewer will display on the projector while the computer monitor displays the preview images. |
All the image editing and settings you made on the Workflow hub will carry over to the Sales Presentation. Use right-click or the toolbar to rotate, rate, colorize, and group the images. See the "Digital Workflow Reference Guide" for a complete list of features available in the Sales Presentation.
Click Image Groups in the Show group on the ribbon to display your image groups on the right portion of the screen. You can then select the group t you want to view.
Use the Image Viewer portion of the screen to rank images as not selected (red), undecided (yellow), or selected (green). You can use the arrow keys to move through the images and then use the number keys or the ranking buttons below the image to rank each image. Note: If using the number keys, use 1 for "selected/green," 2 for "yellow/undecided," and 3 for "not selected/red."
Use the Ctrl key to select multiple images to view side-by-side in the Image Viewer. You can select up to 6 images at a time.
In the Image Viewer, press the Ctrl key and left-click on the image to zoom in, or right-click to zoom out.
If you do not want to use the Image Viewer, click Image Viewer on the ribbon and your previews will fill the screen.
Use the Magnifier tool on the ribbon to view the image at the actual size.
Click Crop on the ribbon to crop an image. Click Save Crop to maintain the crop and hide the area outside of the crop box.
You can display an image in actual wall print sizes by using a projector. Highlight the image you want to project in actual size and press the hot key you set up in Maintenance > Digital > Image Sizes. Remember, if you want to turn a horizontal image into a vertical one, or vice-versa, simply hold down the Shift key while making the hot-key selection and Spectra will invert the width and height for you automatically. For more information refer to the "Image Sizes" and the "Workstation Preferences" topics.
Once you are finished rating and editing the images, you are ready to record the client's order.
From within the Sales
Presentation, click Order Information  in the Show
group on the toolbar.
in the Show
group on the toolbar.
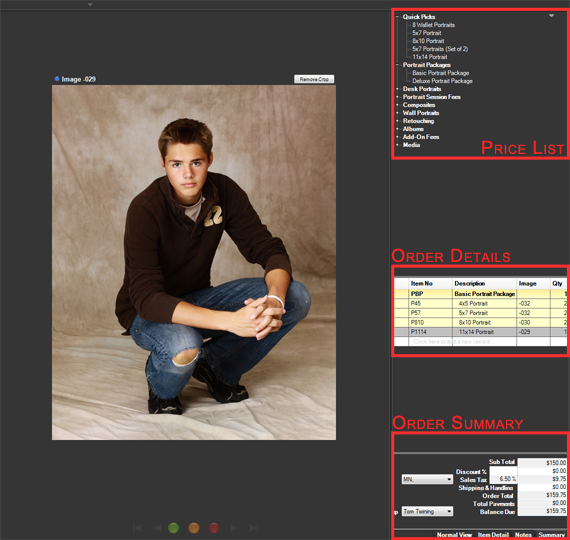
The order information will appear on the right portion of the screen. You'll see your price list with your Quick Picks listed at the top. See the "Price List Items" topic of the "Working with Price Lists" chapter for more information.
Select the products and packages the client wants to order for each image. If you select a package that has multiple prints, find the image for each print and double-click on the image number field to assign the image to that print.
To set the crop for each product, make sure that you’ve set the print height and width in Price List Item Maintenance. Then on the order, select the line item you want to crop. Click Crop and draw the crop. To invert the crop box hold the Ctrl key and draw the crop box.
Click the Order
Options arrow in the top-right
corner to view additional order options:

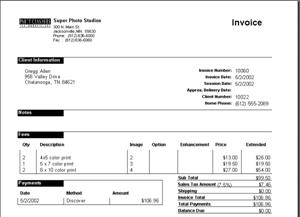
View Order Detail - Opens the invoice.
View Different Order - Allows you to select another invoice from this session.
Create New Order - Creates a new blank order.
Create New Payment - Creates a new payment on this invoice.
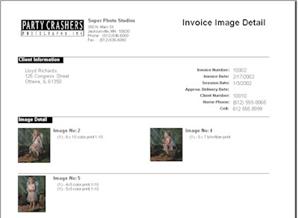
Print, Preview & Export - Allows you to view, print, or export the invoice and image detail.
Show Prices - Shows the item prices on the screen.
Use the Order tabs at the bottom to view additional order information:
Item Detail - View item options, enhancements, notes, and pricing information (if you are displaying prices).
Notes - Record invoice level notes.
Summary - View the order subtotal, tax, discounts, and total.
Click Save on the toolbar to save the invoice. If the client has previously made a customer deposit, you will be prompted to apply it to the current invoice. Otherwise, you can click New Payment to record the client’s payment.
After recording the payment, click Print to print an invoice and image detail sheet for the client.
See the “Working with Invoices” chapter for more information.
Once you've created the invoice, you should create a production order. See the “Working with Production Orders” chapter for more information on creating new production orders.
(available in ![]()
![]()
![]()
![]()
![]() )
)
You have the ability to customize your own colorization settings, such as black & white, sepia, or other tones and styles. Go to Maintenance > Digital > Image Colorizations.
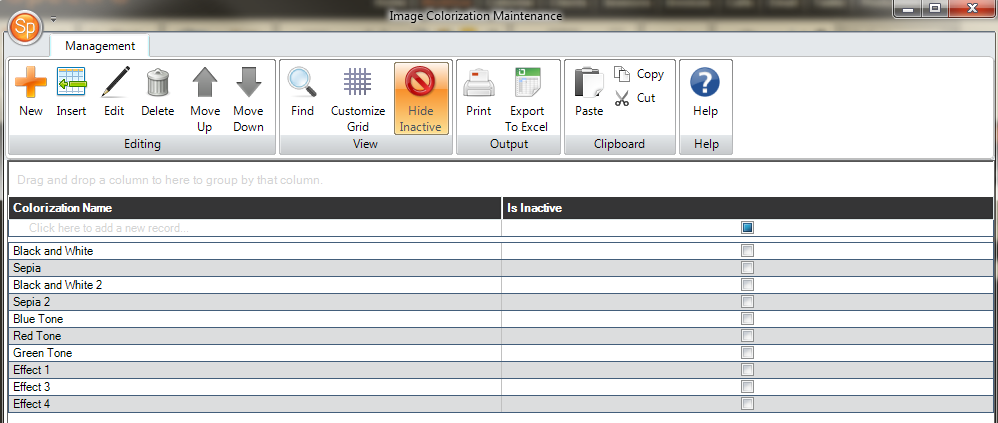
By default Spectra includes the black & white and sepia options. You cannot delete the black & white or sepia colorizations, but you can modify them.
Select inactive for colorizations you no longer want to use, but that may have been applied to images in outstanding orders.
The order of the colorization options will determine the keyboard shortcut used from the Workflow hub and the Sales Presentation (Ctl 2-9). Use Move Up and Move Down on the ribbon to change the order.
Click New in Editing group of the ribbon to add a new colorization.
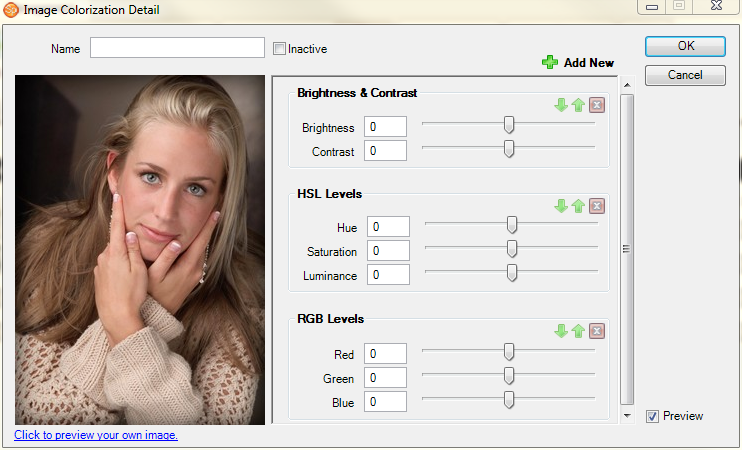
Image Colorization Detail
On the Image Colorization Detail page, type the Name for the colorization preset. When creating colorization presets you have a number of adjustments you can set, all similar to tools used in Photoshop to correct or enhance images:
Brightness & Contrast - Use the sliders to increase or decrease brightness and contrast.
HSL Levels - Use the sliders to increase or decrease hue, saturation, or luminance.
RGB Levels - Use the sliders to increase or decrease the red, green, and blue levels.
Curves - Click Modify Curve Adjustment. Select the channels you would like to adjust and then click and drag to adjust the curves.
Levels - Click Modify Level Adjustment. Select the channels that you would like to adjust and then click Black, Gray, and White Input Level settings and/or the Black and White Output Level settings to adjust the levels.
Click Add New to add one or more of the these adjustments to the list if they do not already appear.
Use the green arrows in each adjustment group to re-order the sequence that Spectra will use when applying the settings to the image.
(available in ![]()
![]()
![]()
![]() )
)
The Composites feature in Spectra allows you to create custom composites and then drop images from your sessions into the composites, creating custom digital products for your customers.
 |
PATHWAYS TO SUCCESS
The Composites feature is a powerful tool. Use the Composites feature to create digital products such as multi-image wall portraits, custom album pages, holiday cards, sports cards, or image effects. Quickly and easily drop your client’s images into the composite, instantly creating a custom digital product. |
Go to the Maintenance > Digital > Composite Templates.
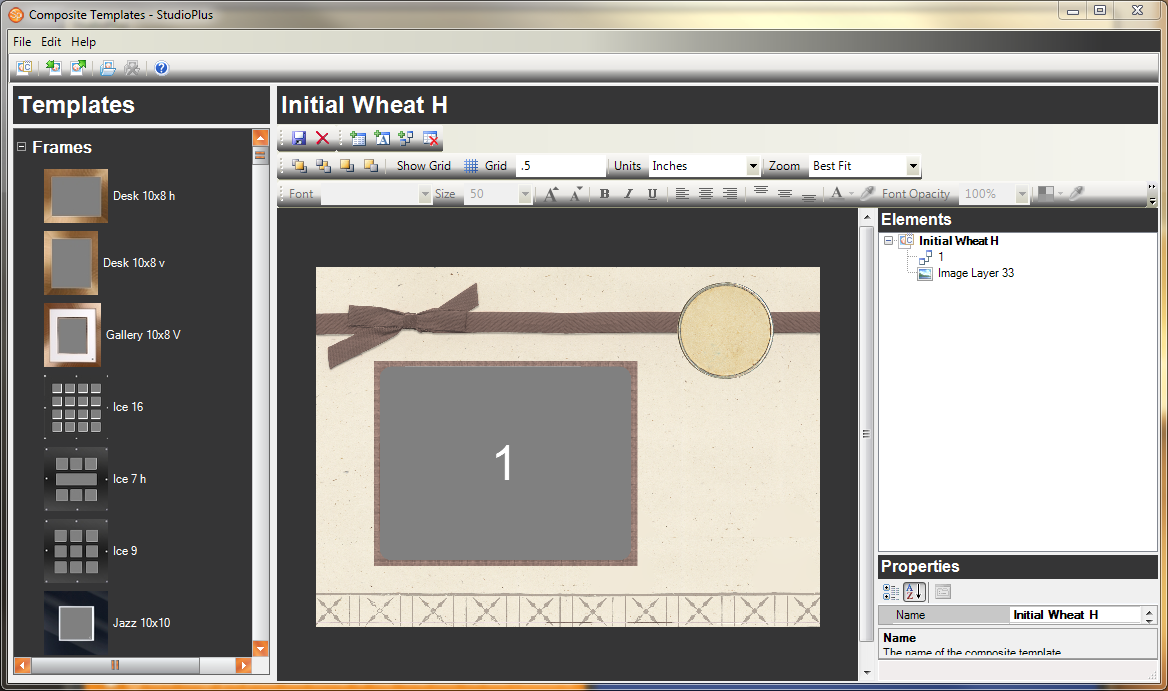
The Composite Template Designer
The Composite Template Designer is where you can create new templates to use in Digital Workflow and the Sales Presentation to create custom digital products.
Your templates will be sorted into template groups. To create a new template group go to File > New Template Group.
To create a new template, highlight the template
group that you want to create it in and click New
Template , or click Import
Template
, or click Import
Template  to import a Spectra template
from a file.
to import a Spectra template
from a file.
|
PATHWAYS TO SUCCESS
When creating composite templates be creative! By using PNG files and JPEG files the sky is the limit. Composites will make your images look great and help you to increase your add-on product sales. |
|
ATTENTION!
The Composite Templates are not stored in your main Spectra database, but in a separate database called SPImages.mdb. This data file only contains your composite templates. You will need to make sure you back up your Composite Template database when you back up your main data file. See the "Database Utility" chapter for more information. |
To modify the layout and properties of your template, highlight the template element in the Elements section. Then, in the Properties window, adjust the following properties:
Active – Determines whether the template should be made available in the Digital Workflow and Sales Presentation.
DPI – Sets the DPI of the template that will be used for image rendering.
Name – Name of this template.
Size – The overall size (in pixels or inches) of this template.
Split Layers – Controls whether this template is to be rendered out as a single image or as individual layers. Set to False if it should be rendered as a single image. Set to True if each layer will be rendered individually.
You will build your template by adding elements. There are three types of elements that you can add - Image Layers, Image Drop Zones, and Text Layers.
Image Layers
- Image layers are elements that can be a solid color, a JPG file,
or a PNG file. Each template will have a background image layer by
default. This layer is required and should be the same size as the
overall template. To create a new Image
Layer click New
Layer  . To adjust the Image
Layer properties, highlight
the image layer from the Elements
list and adjust the Properties
window:
. To adjust the Image
Layer properties, highlight
the image layer from the Elements
list and adjust the Properties
window:
Color - The color of the Image Layer using RGB values.
Default Layer - If you make a template with multiple layer options, you can choose which one shows by default.
File Name - To add an image file to this layer, click on the browse button (...) and locate the file. Once selected, Spectra will import the file into the template and store it in the SPImages database.
Final - Controls if this Image Layer should be included in the final image rendering. If False, it will be excluded when rendering final images. If True, it will be included.
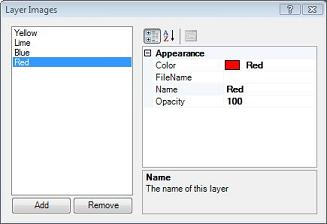
Layer Image Options
Layer Selections - If you want to have multiple selections that you can quickly change, add image option layers. Click on the 3 dot button to get the Layer Images screen. On this screen you can add layer choices using different colors or images. If you choose a PNG image with transparency areas, you can use it as a mask.
Location - The location of the layer in pixels relative to the upper left corner of the template.
Name - The name of the layer for easy reference.
Opacity - The opacity of the layer – 0 is fully transparent and 100 is fully opaque. You can set the value to any number between 0 and 100.
Size - The size of the image layer in pixels or inches.
|
HERE'S A FLASH FOR YOU!
The Image Layer is a very useful tool. Use the Image Layer to create key lines, drop shadows, and borders by adjusting the size, color, opacity, and order. Use JPEG files to create the graphic part of a holiday card. Using PNG files is like creating a built-in effects layer on top of your images. Use a PNG file if the image layer is going to overlay the zone layer where you’ll drop the client’s image. |
|
HERE'S A FLASH FOR YOU!
The Composite Template uses PNG files to overlay. A PNG file is an image file that you can create in Photoshop similar to a JPEG. However, a PNG file has a built-in transparent layer. To create the PNG file in Photoshop, simply cut out the area where you want the transparency and save the file as a PNG file. Any areas without a layer will automatically become transparent. |
Image Drop Zone
Layers - Drop zone layers are the areas in the template where
you will drop images from the client’s session. To create a new Image Drop
Zone, click New
Zone . To adjust the drop zone’s properties,
highlight the zone from the elements list and modify it in the properties
window:
. To adjust the drop zone’s properties,
highlight the zone from the elements list and modify it in the properties
window:
Location - The location of the drop zone in pixels relative to the upper left corner of the template.
Opacity - The opacity of the layer - 0 is fully transparent and 100 is fully opaque. You can set the value to any number between 0 and 100.
Size - The size of the drop zone in pixels or inches.
Text Layers
- These are the areas where you will insert text into a composite.
Text can either be fixed text built into the template, or it can be
text that is editable later. For example, you can change the text
later to be the client’s name. To create a new Text
Layer, click New
Text Layer ![]() . Most of the commonly used properties
for the text layer can be adjusted in the font toolbar above the template.
. Most of the commonly used properties
for the text layer can be adjusted in the font toolbar above the template.

Other properties can be modified the Properties
window:
Alignment Horizontal - The horizontal position of the text within the text layer (left, center, or right)
Alignment Vertical - The vertical position of the text within the text layer (top, middle, or bottom).
Background Color - The color of the background of the text layer using RGB values.
Background Opacity - The opacity of the background color - 0 is fully transparent and 100 is fully opaque. The value can be set to any number between 0 and 100.
Character Spacing - Sets the number of additional pixels to add between characters.
Character Width - Sets the width of the characters if you wish to override the font default.
Color - The color of the text using RGB values.
Final - Controls if this text layer should be included in the final image rendering. If False, it will be excluded when rendering final images. If True, it will be included.
Font - Choose the font for the text.
Font Opacity - The opacity of the font - 0 is fully transparent and 100 is fully opaque. You can set the value to any number between 0 and 100.
Is Color Editable - Choose whether the text color will be editable (True) or not editable (False) outside of the Composite Template designer.
Is Font Editable - Choose whether the text font will be editable (True) or not editable (False) outside of the Composite Template designer.
Is Position Editable - Choosing whether the text position will be editable (True) or not editable (False) outside of the Composite Template designer.
Is Text Editable - Choosing whether the text will be editable (True) or not editable (False) outside of the Composite Template designer.
Location - The location of the layer in pixels relative to the upper left corner of the template.
Name - The name of the text layer, for example "Client's Name." Setting this property to something useful will make the text layer easier to use in the Digital Workflow and Sales Presentation.
Quality - Font quality style used to draw the font. Anti-aliased is the default method used to blend the font into the background. Clear type can sometimes yield a better result during rendering, but is not always supported by all fonts.
Rotation - The ability to rotate the text within the text layer.
Size - The size of the layer in pixels or inches.
Smoothing - The amount of anti-aliasing applied to the text being drawn onto the canvas. The value must be great than 0. The larger the number, the more blending will occur. If the value is too high, the text will may appear washed out.
Text - The actual text shown in the composite. If the Is Text Editable property is set to 'True,' then this text can be changed later in the Digital Workflow and Sales Presentation.
You can adjust the order of the element layers by dragging and dropping the elements in the Element list. The first elements on the list will be the furthest back, the last elements will be on the top.
Next you will need to associate the composite templates you have created with a price list item. You can either link a composite to a specific price list item, or you can set up price list items that can be ordered for any composite.
Go to Maintenance > Price List > Price Lists.
Select the price list that will contain the composite. Highlight the Composites category and select the item group you will be adding the composite item to. The item must be created in the Composites category for it to display the composite drop-down list shown below.
Create a new item (see the "Working With Price Lists" chapter for more information). In the Composite Template drop-down list, select the composite template that is associated with this item.
You can also choose the Allow Any Composite Template option, which will allow you to order any composite for this item. Using this setting, you can set up just one 8x10, 5x7, etc. and order any composite for that size.
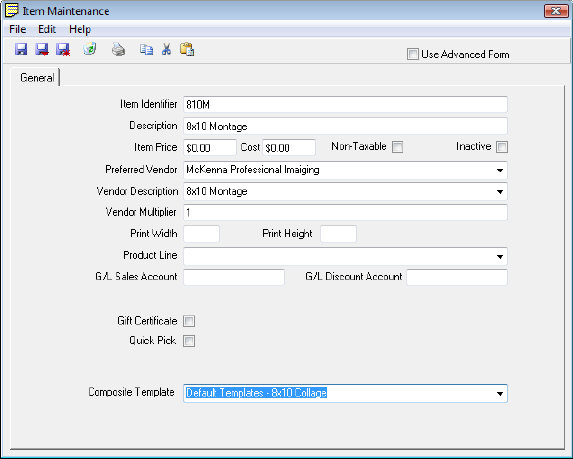
Item Maintenance - Composites
Once you have created composite templates you can begin to add images to them for your clients.
Go to the Workflow hub and then open the list of sessions at the Presentation stage.
Select a session that you would like to create an image composite for.
Click New Composite
 .
.
The composite designer will appear. From the template drop-down list, select a composite template. You will only be able to select a composite template that is linked to a price list that is valid for the session you have selected.
Drag and drop images into the composite. Use the scroll wheel to adjust the size of the image. Right-click on the image to fit (maximizes and centers the image in the opening), flip, rotate, or colorize the image.

Digital Workflow - Composite Designer
If you have a composite with multiple Image
Drop Zones,
you can select an image and, while holding down the Shift
key, drop the image into an Image
Drop Zone.
This will populate all of the Drop
Zones with this one image.
This can be useful if you are using composites to create sheets.
You can also select multiple images using the Shift
or Ctrl keys. Holding down
the Ctrl key, drag and drop
the images into the Image
Drop Zone.
This will populate multiple image zones with each image you selected.
If you have a composite with an editable Text Layer, you can either click on the text layer to select it, or right click anywhere on the composite to select it. Once selected, a font tool group will appear in the ribbon, giving you options to change the text appearance. To edit the actual text of the Text Layer, you can either double-click on the Text Layer, or right-click anywhere on the composite and select Edit Layer.
Once you have completed laying out your composite,
click Save  .
The composite will now be saved in your session images and you will
see a preview image for this composite with the file name based on
the file name of the other images with a C## number (C01, C02).
.
The composite will now be saved in your session images and you will
see a preview image for this composite with the file name based on
the file name of the other images with a C## number (C01, C02).
Click Close Designer to close. Or click Create New Composite to create another composite.
Saved composites can be included in a slideshow or ordered in the presentation. You cannot rotate, crop , flip, or edit (in Photoshop) the saved composite.
All of the composite options are available in the Sales Presentation as well.
If you have selected a composite from the Sales Presentation you have the option to Modify the composite. This will open the composite in the Composite View and allow you to change the images in the composite.
If you are viewing the order information you will have the option to Order the composite. This will add the composite item to the invoice. If you have more than one price list Item associated with this composite you will be prompted to select which item they are purchasing.
You can also select the composite from the price list (or include Composite Item in a Package). Then select the composite from the order detail list and you will be able to drag and drop images into the composite.
(available in ![]()
![]()
![]()
![]() )
)
Rendering images is the process where Spectra builds new images from the changes you’ve made to the images in Spectra. You may render out images for proofing or preview purposes – such as printing proofs or loading images up to a website – or you may render images from an order for printing.
|
ATTENTION!
If you are using Spectra to render images, do not crop your images in your image editing software or your capture software. Spectra's preview images reference a full-frame image. Once you set the crop in Spectra’s Digital Workflow, that crop will be referenced in rendering images. If you crop the hi-res, raw, or retouched files, your images will not be rendered properly. |
Go to Digital Workflow.
Click Render
Images .
.
The Render Images screen will appear.
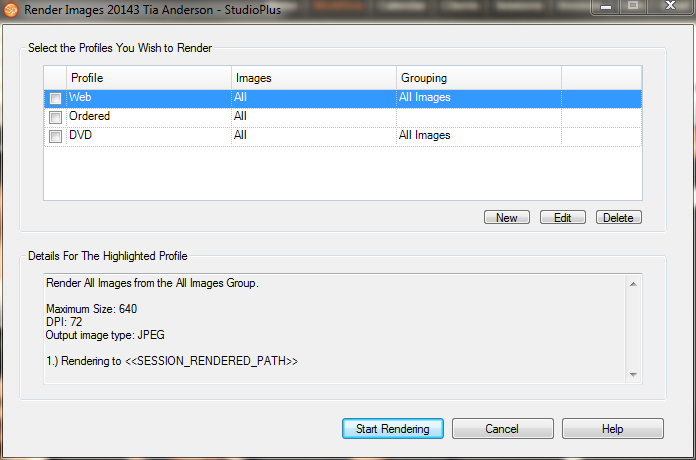
Render Images
Click New to create a new render profile or click Edit to modify an existing profile.
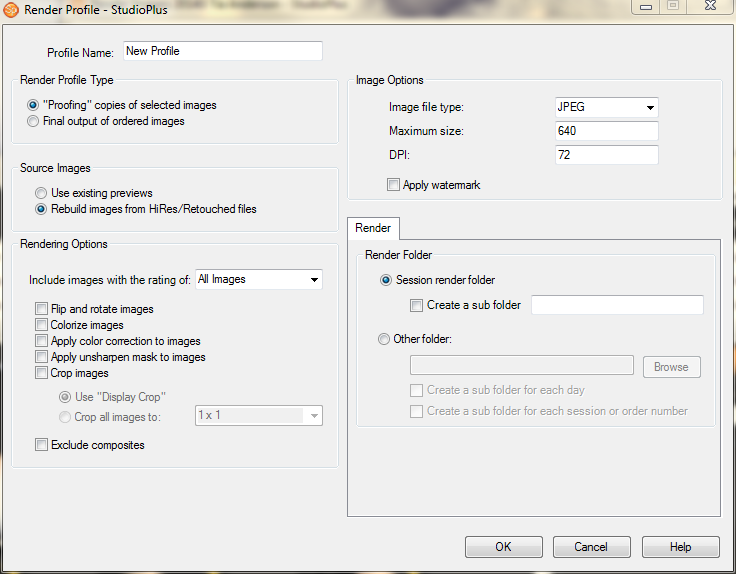
Render Profile Maintenance
Enter the profile name.
Select the Render Profile Type, either 'Proofing' or 'Final Output.' Proofing is designed to render a set of images that have not yet been ordered (used for proofing and preview purposes). Final Output of ordered images will render just those images that have been ordered (for printing purposes).
If you are creating images for proofing select the Source Images. These are either the existing previews or rebuilt previews from the hi-res or retouched files. If there is not a corresponding image in the retouch folder, then the hi-res file will be used.
Under Render Options select which images to include.
Select what effects you want to have applied to the images when they are rendered: flip, rotate, colorize, color correction, and unsharpen mask (from when you created the previews originally), crop images, and/or exclude composites.
Under Image Options select the file type, maximum size in pixels, DPI, and whether to include a watermark.
Under Render Folder select where to save the images once they are rendered, either to the session render folder or a different folder.
Click OK to save the profile.
|
HERE'S A FLASH FOR YOU!
Rendering images can save you a lot of time when you are proofing your images. The proof render profiles allow you to batch out your images for proofing after you've done your initial editing and add a watermark. Because you have control of the DPI and pixel size, you can control the resolution of your images. Here some examples of how you might use the proof profiles:
|
|
ATTENTION! If you are rendering images for final output you need to enter a height and width in the price list for each item that will be rendered. If you do not enter the height and width the images may not render properly. |
If you are creating images for final output, under
Render Options select if you
will output one copy of each ordered image or separate versions of
each image.
Note: If you output one copy the
images will not be cropped, rotated, flipped, or colorized.
If you select to output separate versions, next select to apply the crop, rotate, flip, and colorization to the output images.
Select the Composite Options. Choose to flatten the composites into one final JPEG or not. OR, choose to flatten just the files included in the final file based on the Composite Template settings (controlled in the Composite Template designer).
Select Create copies of images according to quantity ordered if you want a separate image file rendered for each quantity on the invoice.
Under Image Options select the file type and DPI.
Under Render Folder select where to save the images once they are rendered, either to the session render folder or a different folder.
Click OK to save the profile.
Once you have created a render profile you can render images for a session, invoice, or production order.
Select a session on the Digital
Workflow and click Render
Images . You will only have proofing profiles
available if rendering from a session. To select final output profiles
open an invoice or production order and go to Action
– Render Images.
Mark the profiles that you want to run.
At this time you can select to change the image selection by clicking on the images selection and choosing All, Not Selected, Undecided, Selected, Ordered or Highlighted for Proof Profiles. OR, for Final Output Profiles you can either select All or Prompt which will prompt you for each line item from the order. You can also override the grouping selection and choose a specific image group to render.
Click Start Rendering and you will see a status bar for each render profile.
Once the rendering is complete go to your render folder to view the images.
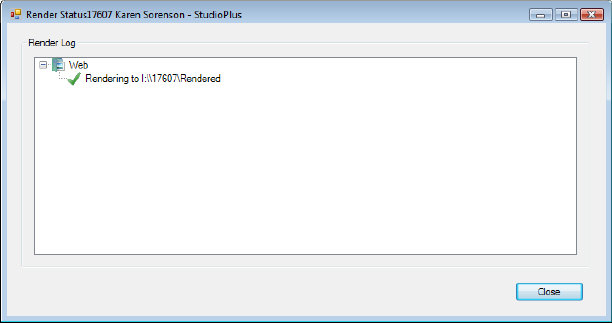
Render Status
![]()