(available in ![]()
![]()
![]() )
)
Create and maintain a list of all the organizations you work with, such as high schools, as well as their address and yearbook information. Then, select the proper organization when setting up a client or senior session. Go to Maintenance > Client > Organizations to set up and maintain your organizations.
Organization Maintenance
Select an organization from the Organization Maintenance list and click Delete to remove it from the list or double-click to modify it. Click New to add a new organization. Adding or modifying an organization will open the Organization Maintenance Detail screen. Update information on the General tab, the Yearbook Options tab, and the Custom tab. Each of these tabs is described below.
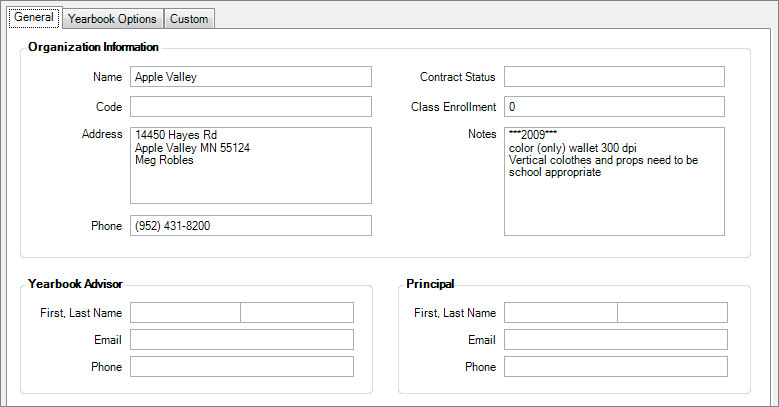
Use this tab to enter general information about an organization, including name, address, and contact information. This information can be viewed on the Organization tab of any client or session that is part of the organization.

Organization Maintenance Detail - General Tab
Name - Enter the name of the organization/school.
Code - Record an organization code, if available.
Address - Enter the organization's address.
Phone - Enter the organization's phone number.
Contract Status - Record the status of any contract your studio has with this organization.
Class Enrollment - Enter the class size. Use this number for reporting purposes.
Notes - Record any notes that apply to this organization, such as yearbook requirements.
Yearbook Advisor - Enter the contact information for the high school yearbook advisor.
Principal - Enter the contact information for the high school principal.
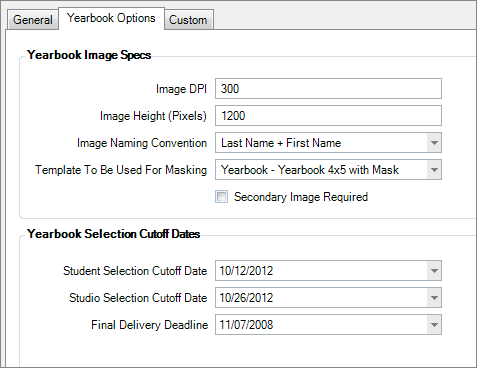
If you track yearbook selections using Spectra's digital workflow, set up the options on this tab. Spectra will use these settings to prepare the yearbook images for the school and to help you keep track of deadlines. For more information about yearbook tracking and the high school senior workflow, read the knowledge base article, "How to Manage High School Senior Workflow."

Organization Maintenance Detail - Yearbook Options Tab
Image DPI - Enter the image dpi required by the organization.
Image Height - Enter the image height (in pixels) required by the organization.
Image Naming Convention - Select a naming convention only if this organization requires a different naming convention than the default which is set up on the Organizations tab in Studio Preferences. Please note: Selecting a naming convention other than "None" for this organization will override any image naming selection made in Studio Preferences.
Template to be used for Masking - Select a masking template only if this organization requires a different template than the default which is set up on the Organizations tab in Studio Preferences. Note: Selecting a masking template for this organization will override any selection made in Studio Preferences. Design your own masking templates in Maintenance > Digital > Composite Templates.
Secondary Image Required - Check this option if this organization requires two yearbook image selections.
Student Selection Cutoff Date - Enter the last day that students can select their yearbook image. Use this date for filtering and reporting.
Studio Selection Cutoff Date - Enter the cutoff date for the studio to make yearbook selections. Use this date for filtering and reporting.
Final Delivery Deadline - Enter the date that the images need to be delivered to the school. Use this date for filtering and reporting.
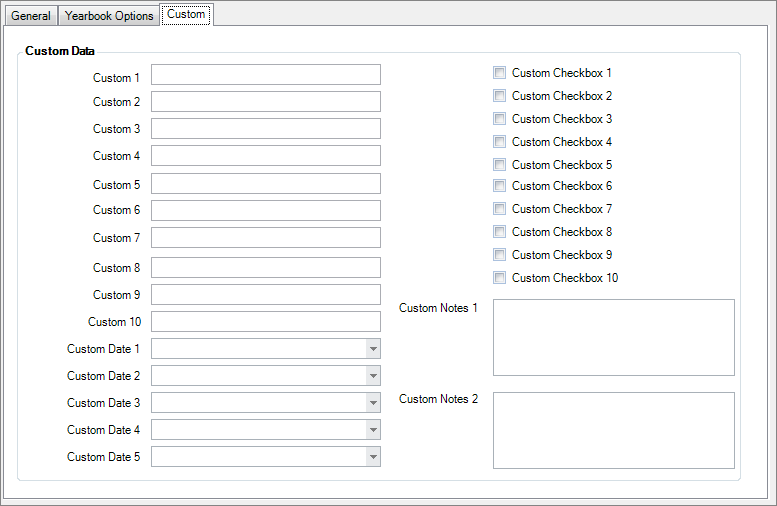
Use the fields on this tab to record additional information you wish to track for this organization. Set up the names for the fields you want to use on the Organization tab in Maintenance > Studio > Custom Labels.

Organization Maintenance Detail - Custom Tab