In this topic... Show
In Spectra, a production order is created from the invoice used to record the customer’s order. A production order can be related to one client, or to several clients, if desired. This depends on how your studio sends information to your lab.
The steps below outline how to create a new production order. This is done from an invoice so, if needed, please refer to the section on creating an invoice to learn how invoices are generated.
Create or open the desired invoice. This can be done from the client record under the Invoices tab, from the Invoices hub, or from the session record under the Invoices tab.
Click New Production Order from the Invoice record.
Complete the steps on the New Production Order Information form.
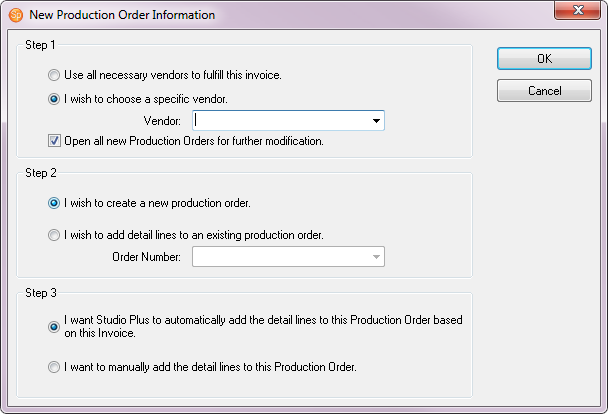
New Production Order Information Form
Step 1 - Select the vendor for this production order. If you select "Use all necessary vendors to fulfill this invoice," Spectra will automatically create a separate production order for each vendor that is necessary to fulfill this client's order.
 |
ATTENTION!
Preferred Vendors and New Production Orders The items on your invoice must have a preferred vendor selected in Maintenance > Price List > Price Lists. Creating a new production order will not create a detail line for any item that does not have a preferred vendor selected. See the"Price List Items" section of the "Working with Price Lists” chapter for more information. |
Step 2 - Decide if this will be a new production order. If you're combining multiple client orders into one production order, select the production order you have already started from the drop-down list.
Step 3 - Decide if you want to create the order manually or have Spectra do it for you. If you ask Spectra to create the order for you, only those items assigned to the selected vendor will be added to the production order. When you create an item in your price list, you assign a vendor to that item. Here is where that information is used. You may change the vendor for individual items on specific invoices. See the "Managing Invoices" and "Price List Items" topics for more information.
Click OK when you are done with these steps to move to the Production Order screen.
On the production order, the vendor information should automatically be completed. The order number usually comes from the bag or envelope provided by the vendor. It's strongly recommended that an order number be used to make it easier to find the production order later. Fill in any of the other informational fields as desired. See the "Features of Production Orders" topic for more information about these fields.
The Vendor Invoice Number will need to be entered if using the vendor invoice to create your profit analysis report. Go to Maintenance > Preferences > Studio Preferences > Reports tab to define your profit calculation.
The status of the production order will automatically default to the first step in the cycle as you defined it when setting up your production statuses. See the "Production Statuses" topic in the “Spectra Maintenance” chapter for more information.
If you chose to have Spectra create the production order for you, or if you're adding to an existing production order, there will be lines appearing on the Detail tab. If you'rel creating the order manually, the Detail tab will be blank.
To add a new line, click Add. To modify an existing line, highlight that line and click Edit. Either of these actions will open the Print Order Detail screen.
See Completing a Production Order Detail Record below for more information on completing the production order process.
If this production order has a type of print order, as defined in your Production Order Types, you can see the following detail screen by double-clicking on an image line. Otherwise, you'll see a more basic, Generic Detail screen.

Print Order Detail
Single Image or Composite - If this product will contain only one image, select Single Image. If this product will contain multiple images, select Composite. Enter each image position.
Image Number - Enter an image number associated with this image.
Raw Image Path - Enter the path to the raw image file associated with this image.
Hi-Res Image Path - Enter the path to the developed hi-res file associated with this image.
Preview Image Path - Enter the path to the preview JPG file associated with this image.
Retouch Image Button - Click Retouch Image if you want to open the hi-res image in your image editor, like Photoshop. If you modify the image, you can have Spectra create a new preview image by right-clicking on the image and clicking Make New Preview.
Enhancements - If this image should be enhanced in any way, use this section to track these enhancements. Sample enhancements may include Fix stray hair, Remove facial blemish, Make Sepia, or Add logo. Enhancements must be predefined in the Item Enhancement List.
Description - What do you call this enhancement in your studio?
Vendor Description - If the lab is responsible to perform the enhancement, what does your lab call it?
Notes - Any special notes.
Apply To All - Do you want this enhancement to apply to all products related to this image on this order?
Studio Or Vendor - Who is responsible to perform this enhancement?
Completed - Check this box once the enhancement has been completed.
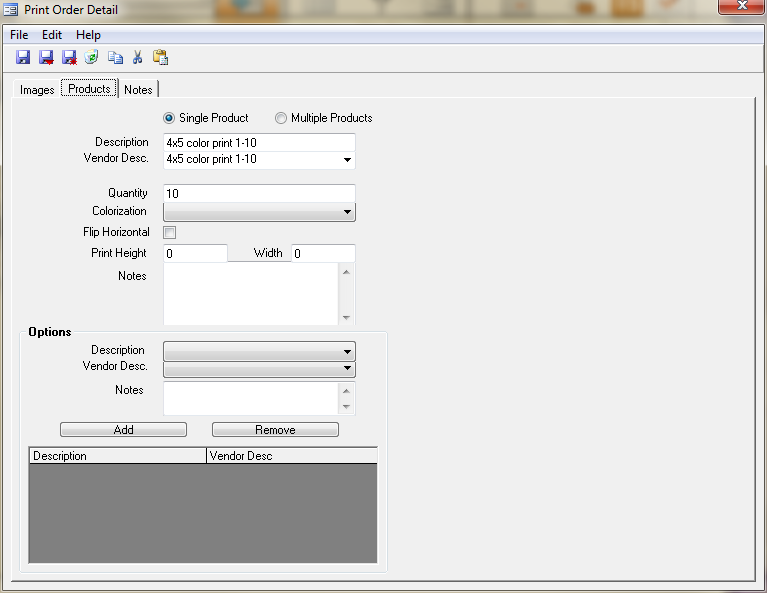
Print Order Detail - Products Tab
Single Product or Multiple Products - If just one product will be created from this image, the "Single Product" option will be selected. If multiple products are to be created from this image, like an 8X10 and a 5X7, the "Multiple Products" option will be selected.
Description - How do you describe this product within your studio?
Vendor Description - How does your lab/vendor describe this product?
Composite - If you are ordering a composite, use this field to select a predefined composite description from a list.
Quantity - How many of this product do you want to order?
Notes - Enter any special notes related to this product.
Options - If you are ordering any special options, like spray or mount options, use the Options section. Options must be predefined in the Item Option List.
Description - What do you call this option within your studio?
Vendor Description - What does your lab call this option?
Notes - Enter any special notes related to this option.
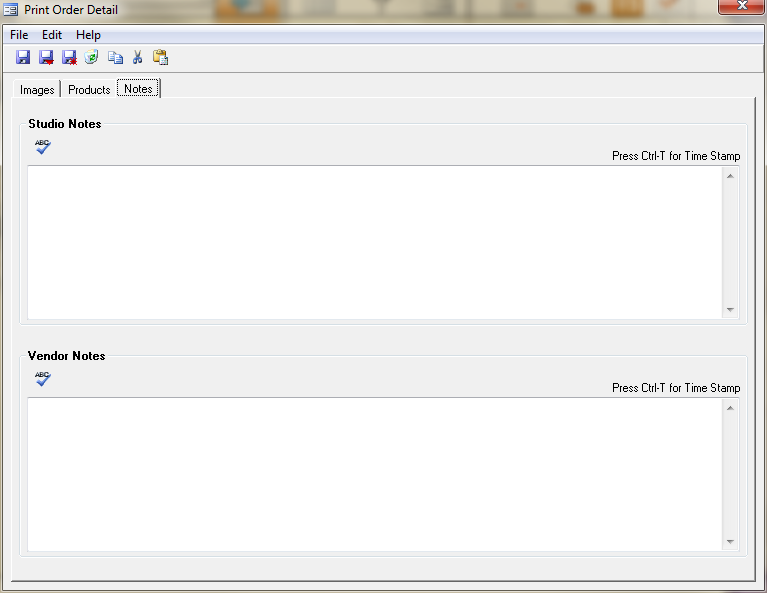
Print Order Detail - Notes Tab
Studio Notes - Enter any special notes that you need within your studio to produce this product.
Vendor Notes - Enter any special notes that your lab/vendor may need to produce this product.
There are several ways to find an existing production order.
From a session, go to the Production tab, choose to view production orders, and double-click on the desired order.
From a client record, go to the Production tab, choose to view production orders, and double-click on the desired order.
From an invoice record, go to the Production tab and double-click on the production order desired.
From the Production hub, double-click on the production order desired.
From any hub, you can scan the bar code and be taken directly to that production order. See the next section on bar coding for more information on setting up and using a bar code scanner.
(available in ![]()
![]()
![]()
![]() )
)
Spectra has the ability to print bar codes for clients, sessions, invoices, and production orders. You can use these bar codes, along with a bar code scanner, to quickly look up records. You can also use the bar code lookup to advance the status of production orders in order to quickly check out or check in orders as they move from one production stage to the next.
Go to Maintenance > Preferences > Studio Preferences and the Miscellaneous tab.
In the Bar Coding Options, select the types of records you want to use bar coding on. Client bar codes print out on client profile and client account labels. Session bar codes print out on session confirmations and photographer confirmations. Invoice bar codes print on invoices. Work orders and purchase orders print out production order number bar codes.
In order to print a bar code on a work order or purchase order, you must be sure to assign a production order number.
If you have a printout with a bar code of a client, session, invoice or production order, make sure you're on the main Spectra screen and that you don't have a client, invoice, session or production order open.
Scan the bar code.
The record should open. If it doesn’t, click on the screen and try scanning again.
If you have a number of work orders or purchase orders with bar codes, you can update their statuses using the bar code scanner.
Go to the Production hub.
Click Barcode
Scan on the ribbon.
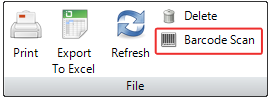
The Bar Code Status Update screen will appear.
You can either advance the status automatically to the next status, or manually set the status that you want to advance the orders to.
Scan in the orders.
As you scan the orders, you will see the current status of the order you are scanning, and you will be alerted if there are any errors.
See the "Working With Price Lists" chapter for more information on bar coding price list products.
Open the production order you want to delete. See the “Finding an Existing Production Order” section above for more details.
Click the Delete icon or go to File > Delete.
If you're positive you want to delete this order, click Yes, otherwise click No.
Select the production order whose status you wish to change. Remember that the history for this production order is under the Status Logs tab.
Click on the button to the right of the status line. The window below will appear.

Production Order Status Change
Enter the date the current step was completed. The default is today's date, but you may override it if desired.
Spectra will automatically advance the status to the next step and due date. You may override this if desired.
Select the assigned user who will complete the next status.
When all boxes are accurately filled in, click OK.
Use this feature to send your images to lab by either burning a lab CD or FTPing your images to a lab. In addition to including all necessary image files, an Adobe PDF or an XML file of the order can also be sent to the lab. Check with Spectra support or your lab to see what labs currently accept the Spectra XML order export.
To burn to a CD you can either use a third-party CD burning software, such as Roxio's Easy CD Creator software, or the integrated CD burning in Windows XP and Vista. See the Workstation Preferences > Miscellaneous chapter for more information and to set your options. If you are using CD creation program like Roxio's Easy CD Creator, then you must enable the CD to be writable before making the lab CD in Spectra. See the documentation on your program for information.
To burn to a DVD you can either use a third-party DVD burning software, such as Roxio's DirectDVD software, or the integrated DVD burning in Windows Vista (Windows XP does not have integrated DVD burning. See the Workstation Preferences > Miscellaneous chapter for more information and to set your options. If you are using DVD creation program like Roxio's Easy DVD Creator, then you must enable the DVD to be writable before making the lab CD in Spectra. See the documentation on your program for information.
To burn DVDs using Windows Vista follow these instructions
Go to Maintenance > Preferences > Workstation Preferences and the Miscellaneous tab. Under CD/DVD Burning choose Use another CD/DVD burning application.
Insert a DVD into your burnable DVD Drive. You will be prompted with the AutoPlay menu.
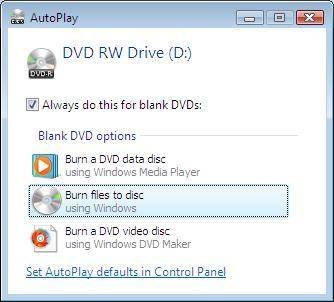
Choose Burn files to disc using Windows, and choose the Always do this for blank DVDs box if you want.
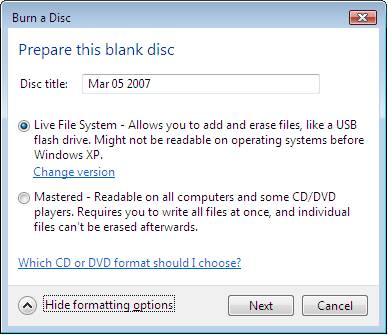
The Burn a Disc window will appear for you to choose the Disc title. Click on the Formatting options down arrow. Confirm that Live File System is selected and click Next.
Once the DVD is done being formatted by Windows you can begin archiving in Spectra. Eject the DVD and choose to close the session in Windows to complete the burning process. Follow the instructions below to complete the archiving process.
You can also use this feature to FTP an order to your lab over the Internet. To set up the FTP process, complete the FTP information in Maintenance > Production > Vendors with your Lab's FTP information.
Insert your blank CD/DVD and prepare for writing, if necessary.
From the Produce Images page in the Workflow, highlight a session that has images that are ready to be sent to the lab. Or from a Session, Invoice, or Production Order Information screen go to Action > Send Images to Lab.
Click Send Images
to Lab. 
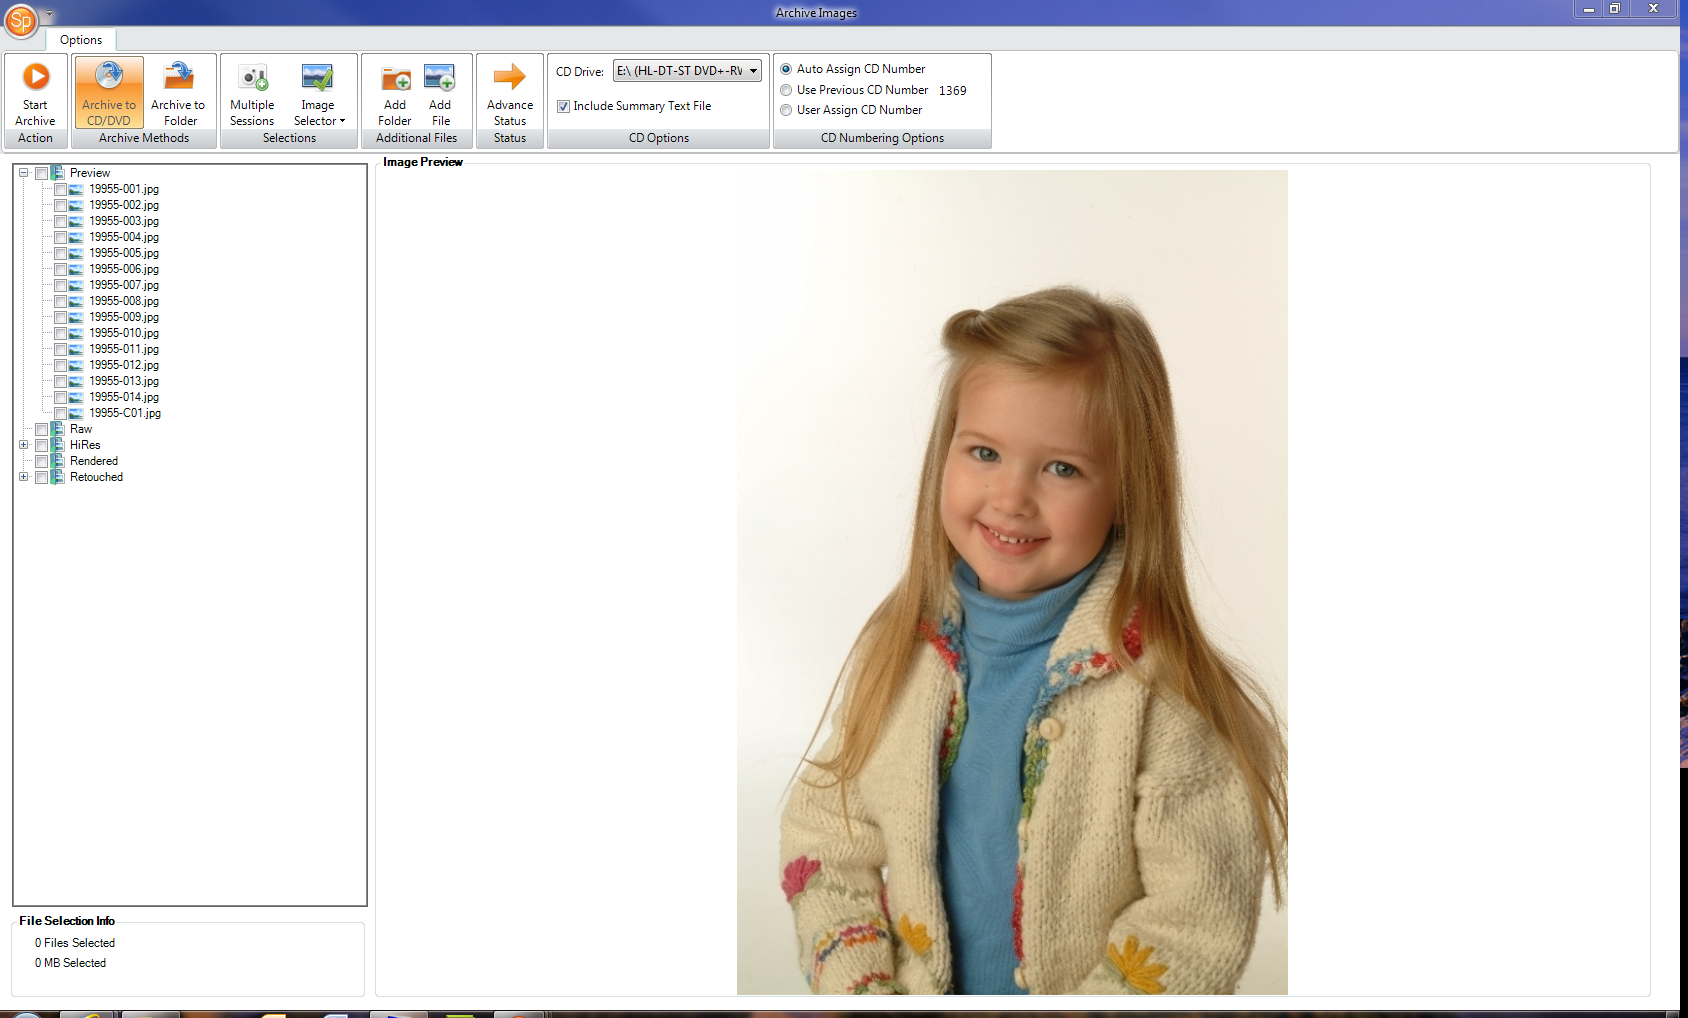
Send Images to Lab
In the Send Images to Lab screen, select the files that you want to send. Use the Image Selector menu to choose which images to send, or check the images individually (the ordered images will be selected by default). Click on an image file to view a preview in the right side. In the lower left side you'll see the number and size of files selected.
Use Add Folder or Add File to add additional files that are not in the session image folders.
Use the Advance Status button if you want the session or order status to be automatically advanced to the next status upon completion.
To burn a lab CD/DVD click the Create CD/DVD button. Select the CD drive, and include a Purchase Order PDF File and/or a Purchase Order XML File to send with your images.
To send images via FTP, click Export to Lab FTP Site. Select the vendor that you are sending the images to, enter the Vendor's Order Number, and select Include a Purchase Order PDF File and/or a Purchase Order XML File to send with your images.
Click Start Export to begin the export to the lab.
If you are burning to CD and there is not enough room on the disk, you will be prompted to insert another disk after the first one is done burning.
![]()